HTC Droid DNA Repair Guide
June 4, 2018 | 0 Comments
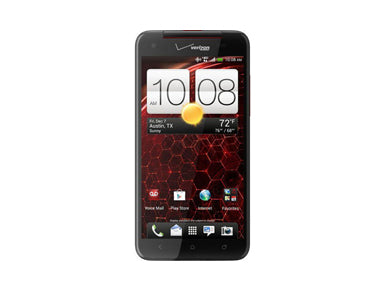
This take apart repair guide shows how to disassemble the HTC Droid DNA quickly and safely. This guide was designed by the Repairs Universe team and can help you replace a cracked or damaged touch screen glass digitizer, and damaged or faulty LCD display screens, as well as other internal faulty parts such as speakers, flex cables, and buttons.
This guide will help you to install the following HTC Droid DNA parts:
- HTC Droid DNA LCD + Touch Screen Digitizer Replacement
- HTC Droid DNA LCD Screen
- HTC Droid DNA Touch Screen Digitizer
Tools Required:
HTC Droid DNA Repair Guide:
How to Fix a HTC Droid DNA (Step-by-Step Guide) :
- You want to begin by removing the sim card and sim card tray at the top of the device by pressing down on the slot with a sim card removal tool or a paper clip to release
- Begin using your safe open pry tool and release the clips holding in the back cover
- Once the back has been removed then you will need to remove the black protective film covering the motherboard
- Now remove the 13 Small Phillips screws and the 2 Torx T5 screws as shown in the figure below
- You will now release the 5 antenna cables, 4 jaw bone connectors, 2 pop connectors, and finally the battery connector also detailed in the figure below
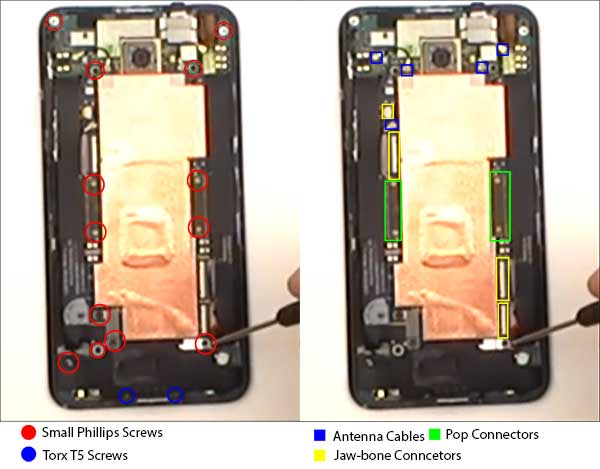
- Once all screws and connections have been removed you may now use your pry tool to gently remove the main motherboard.
- In order to remove the upper circut board you will need to release the front camera and power button flex cable as shown below. (Be cautious not to rip these flex cables as they are held in with some adhesive.
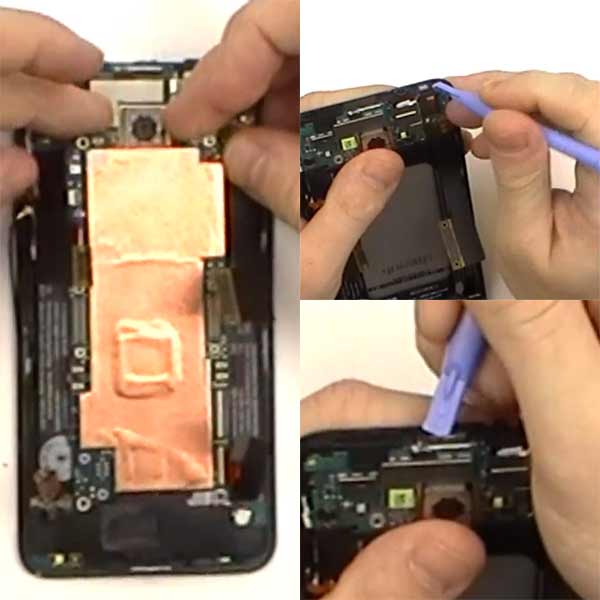
- Next step you will need to take your pry tool to gently remove the upper circut board as well as the lower speaker assembly.
- You may now begin to remove the battery using a pry tool(s) to gently release the adhesive holding it donw in place. Be very cautious not to bend the battery while performing this step. Use equal amount of leverage and pressure to slowly release it from the stong adhesive.
- Finally you will need to genly remove the volume button assembly by peeling it away and sliding the flex cable through the housing.
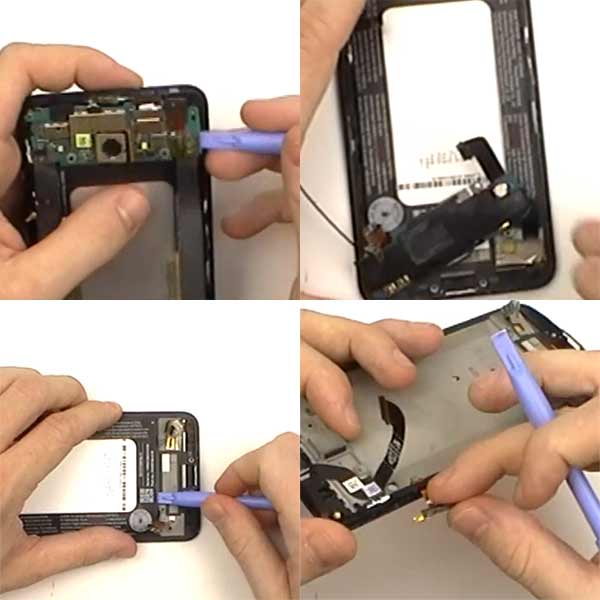
- Now you are able to begin removing the screen. This screen assembly is the LCD and touch screen digitizer which is fused together.
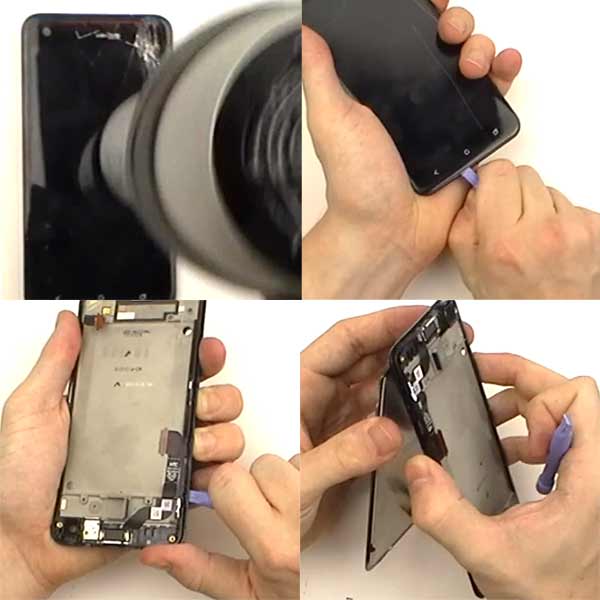
- Using a blow dryer or heat gun beging applying heat to the outer edges on the screen assembly to release the adhesive holding it down to the inner frame.
- Medium heat for 30-45 second intervals will suffice, although durning the removal process you may need to apply more heat to stubborn areas.
- Using your plastic pry tool begin by wedging the chisel end into the seam of the housing and screen assembly to gently release it from the adhesive.
- Take your safe open pry tool and slide it up and down the outer edges across all sides to provide enough space to lift the screen assembly off completly
- You will need to slide the flex ribbons through the housing to completely remove the screen assembly
Notice:
RepairsUniverse does not accept any liability for damage, or injury caused, while you are following our disassemble guides. We make no representations, warranties, or conditions of any kind, express or implied. Utilizing these guides to assist you in repairing your mobile devices will void your warranty. RepairsUniverse strictly prohibits altering or modifying our teardown guides for commercial use, reproduction, or publication
