HTC Incredible Droid Take Apart Repair Guide
June 4, 2018 | 0 Comments
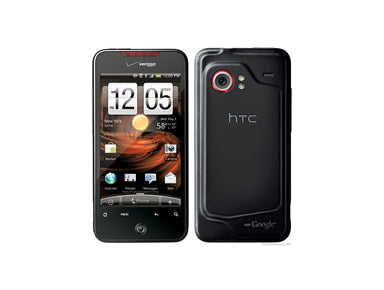
In this video we will take you through the steps on how to dissemble your HTC Droid Incredible phone safely and easily so you can install replacement parts and repair your phone. This take apart repair video guide has been put together by the Repairs Universe team.
This guide will help you to install the following HTC Droid Incredible part(s):
- HTC Droid Incredible Glass Touch Screen Digitizer Replacement
- HTC Droid Incredible LCD Screen Replacement Display
- and other HTC Droid Incredible Replacement Parts
Tools Required:
HTC Droid Incredible Take apart guide:
We recommend watching the below video from start to finish before starting the repair, and then pausing / rewinding and reviewing when needed.
How to Install a replacement touch screen digitizer
To replace the glass touch screen digitizer on this model follow the video above giving you access to the glass and frame. You then need to separate the old glass from the frame. The glass is held to the frame with adhesive. To separate we recommend prying / pushing the glass out. Start from the sides as this has less adhesive. We also recommend using a heat gun or hot hair dryer to warm the adhesive first as this will make it easier. Keep working your way round the phone releasing the adhesive until you are able to remove the glass. Once removed clean off any old adhesive and you are reading to install the new screen.
We now also have a video showing this process below.
Reverse the instructions above to reassemble your phone.
Applying Adhesive to the Touch Screen Digitizer:
The RepairsUniverse team has put together a take apart repair guide for replacing various parts on your HTC Incredible Droid. In this guide, you will learn the steps to properly take your Droid smartphone apart safely. This guide works great in correlation with our video repair guide to insure proper instructions are given.
HTC Incredible Droid LCD & Touch Screen Glass Digitizer Screen Repair Written Take Apart Guide:
- To begin taking apart your HTC Incredible Droid, you will need to first remove the backing and the battery. If you have any problems separating the two, you can use your open safe pry tool for assistance.
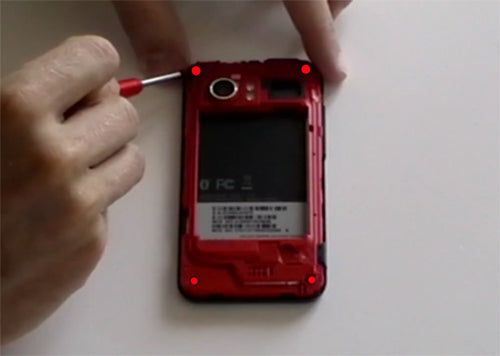
- Next, there will be four screws that need to be removed?one at each corner. Remove them using your small Phillips head screwdriver as shown in figure 1.
Figure 1
- There are clips between the glass and the backing that will need to be pried and released as you go. Using your open safe pry tool, you will gently release these clips. You may need to work the open safe pry tool gently back and forth to separate the two.
- Once you have released the clips, you should be able to easily raise the back cover of the phone. Set this aside along with your screws.
- Next you will need to remove the track pad from the bottom of the phone. To do this, use your open safe pry tool to release the jaw connector, as shown in figure 2. Then you can remove the track pad.
Figure 2
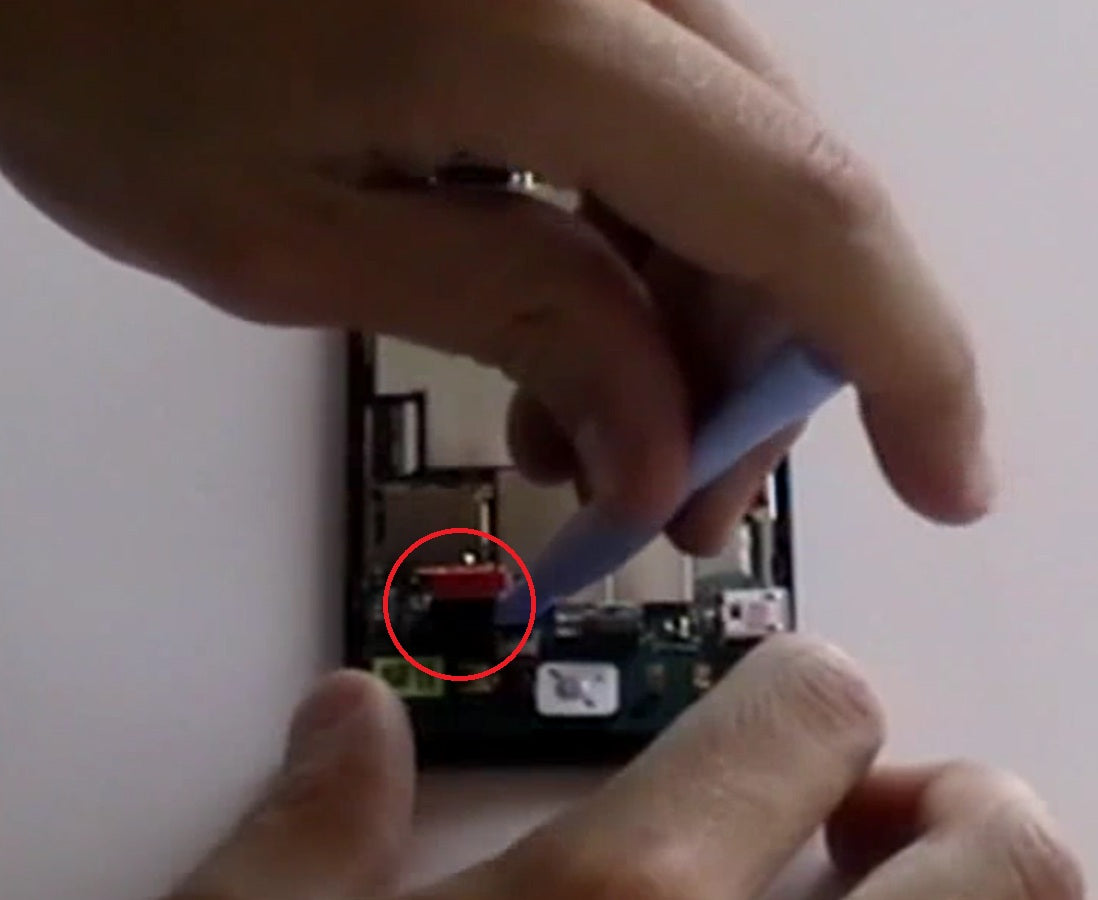
- You will now need to release three more jaw connectors to be able to release the ribbon cable. There are two on the sides, appearing as small pieces of flexible metal, and one on the bottom. Release these gently using your open safe pry tool, and then you can disconnect the ribbon cable beneath.
- Once the ribbon cable has been released, you can remove the two small screws that are holding the mother board in place using your Phillips screwdriver. These two screws are diagonal from each other, with one at the bottom left, and the other on the top right.
- Now that you have removed the two screws, you will be able to gently remove the mother board using your fingers, as shown in figure 3.
Figure 3
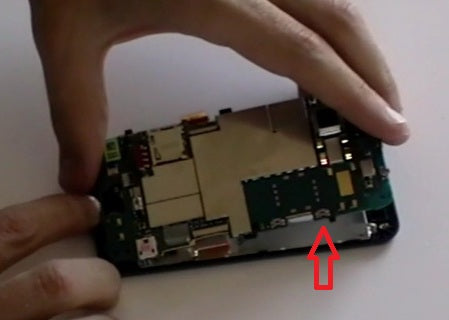
- Now you can begin to remove the LCD screen from the frame by removing the two small screws located at the top.
- Once you have removed these screws, you can remove the LCD screen by using your open safe pry tool to gently separate the frame from the screen, as pictured in figure 4.
Figure 4
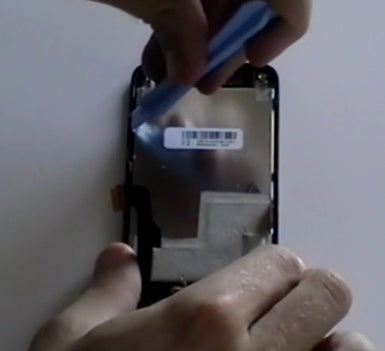
- Once you have pried the LCD screen apart from the touch screen, you can easily replace the screen with your new one by reversing all the steps to achieve a phone that is like new again.
The HTC Droid Incredible is now disassembled and you can replace the damaged part(s) with new ones. Reverse the instructions above to reassemble your phone.
HTC Droid Incredible Earpiece / Buzzer Replacement Guide:
The RepairsUniverse team has compiled all the information you'll need to repair either your loud or earpiece speaker on your HTC Droid Incredible. Using our guides you will be able to safely disassemble your Droid Incredible and replace either the loud speaker or ear speaker.
This guide will help you to install the following HTC Droid Incredible parts:
Tools Required:
Optional Tools:
- Small Flathead Screwdriver
- Adhesive Strips - May be required for certain speakers.
HTC Droid Incredible Earpiece / Buzzer Replacement Guide:
Note: Some speakers may need to be raised, using adhesive, to give full contact with the connectors. You may attempt to re-use the previous adhesive from an old speaker, but fresh adhesive is recommended.
HTC Droid Incredible Loud / Ringer Replacement Guide:
Note: Some speakers may need to be raised, using adhesive, to give full contact with the connectors. You may attempt to re-use the previous adhesive from an old speaker, but fresh adhesive is recommended.
HTC Droid Incredible Disassembly Guide:
HTC Droid Incredible Disassembly & Speaker Replacment Summary:
Using this summary in correlation with the video will insure proper instructions are given and a safe repair is made.
- Remove the back cover, battery, memory card and sim card. Use a T6 Torx screwdriver and remove the 6 screws located at the 4 corners of the phone.
- Release the clips on the edges of the phone using a safe open pry tool. Ease off the back frame of the phone.
- Use the safe pry tool and lift up the jaw connector located near the track pad then gently remove the track pad of the phone. Do the same with the other jaw connectors near the track pad.
- Use the safe pry tool to open the jaw connectors then gently release the pop ribbon cables located on the middle section of the phone. Use a small Phillips screwdriver to remove the 2 screws diagonal from corner to corner of the phone.
- Gently ease up the motherboard from the rest of the phone. Remove the 2 screws located on the top corners of the phone.
- Remove old speaker and replace with new speaker. Use, or reuse, adhesive to hold the speaker in place and give it full contact with the connectors.
Notice:
Repairs Universe's guides are for informational purposes only. Please click here for details.
Learn about restrictions on reproduction and re-use of Repairs Universe's repair/take-apart/installation guides, and about creating hyperlinks to our guides.
