HTC Eris Droid Take Apart Repair Guide Video
June 4, 2018 | 0 Comments

View the downloadable version of our how to fix your HTC Eris Droid screen guide
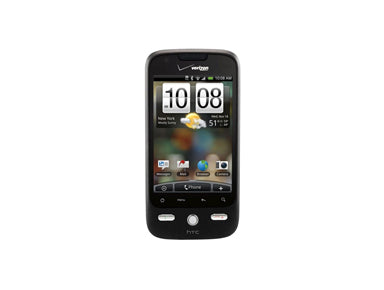
Our take apart repair video shows how to disassemble the HTC Droid Eris cell phone quickly and safely. This video has been put together by the Repairs Universe team and will help you install replacement parts to repair your damage phone. This video shows how to replace the trackball, LCD screen, and touch screen digitizer which are the most likely parts of the phone that are likely to get damaged due to a knock or a drop or through everyday use overtime.
This guide will help you to install the following HTC Droid Eris replacement part(s):
- HTC Eris Droid Glass Touch Screen Digitizer Replacement
- HTC Eris Droid LCD Screen Replacement Display
Tools Required:
HTC Droid Eris Take apart video repair guide:
Your HTC Droid Eris is now fully disassembled. Reverse the instructions above to reassemble your phone.
Applying Adhesive to the Touch Screen Digitizer:
HTC Droid Eris Written Take Apart Repair Guide:
- In order to disassemble HTC Droid Eris phone first of all you need to take off the back cover (battery cover) of the phone.

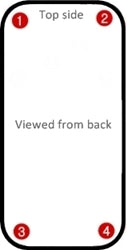
Figure 1
- After the removal of the battery cover you should be able to see four screws (one each at the four corners) as shown in figure 1. Unscrew these four screws from the back of the phone using the T5 screwdriver. Note the position of the screws and keep these screws at a safe place as you will need these while reassembling the phone.
- Once you have removed the four screws you need to pry off the back frame (which includes the battery tray) using the pry tool. It is better to start prying from the bottom (near USB Connector area). The back frame should come out quite easily with a little bit of prying.

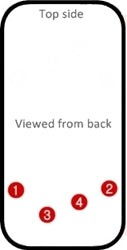
Figure 2
- There will now be four more screws to be removed. Figure 2 illustrates the positions of these screws. Remove these four screws using the small Phillips Screwdriver.
- Now remove the thin copper plate-like object that is covering the main board of the phone. It should come out quite easily.

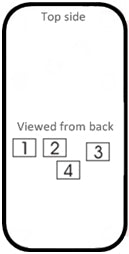
Figure 3
- You will have to undo the four connections using the pry tool. These can be easily located at the lower middle part of the phone as shown in the figure 3.
- Once you have undone the above-mentioned connections, the main board will come off easily. Also take out the trackball assembly.
- You will find a chip pasted at the back of the LCD and also connected with a cable. Just take it off from the back of LCD and put it aside. You do not need to remove the cable from chip.
- Now the LCD can come out. Carefully remove the LCD using the pry tool (do not pry too hard as this may damage the screen).
Your HTC Droid Eris is now fully disassembled. Reverse the instructions above to reassemble your phone.
Replacing HTC Droid Eris Speakers:
Replacing the speakers on your HTC Eris Droid has never been easier, thanks to the RepairsUniverse team. This guide will walk you through all the steps required to safely and quickly replace the ear and loud speaker. Get rid of your old faulty earpiece or ringing speaker with this great in-depth repair guide and make your Droid Eris sound new again!
This guide will help you to install the following HTC Droid Eris replacement part(s):
Tools Required:
Optional Tools:
- Small Flathead Screwdrive
- r
- Adhesive Strips - May be required for certain speakers.
HTC Droid Eris Loud Ringing Speaker Replacement Guide:
HTC Droid Eris Earpiece Buzzer Speaker Replacement Guide:
Note: Some speakers may need to be raised, using adhesive, to give full contact with the connectors. You may attempt to re-use the previous adhesive from an old speaker, but fresh adhesive is recommended.
Notice:
Repairs Universe's guides are for informational purposes only. Please click here for details.
Learn about restrictions on reproduction and re-use of Repairs Universe's repair/take-apart/installation guides, and about creating hyperlinks to our guides.
