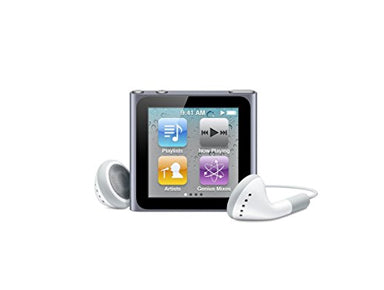
iPod Nano 6th Genertaion Screen Repair Guide
June 4, 2018 | 0 Comments

View the downloadable version of our how to fix your iPod Nano 6G screen guide.
This video guide will walk you through the steps necessary to disassemble and repair your iPod Nano 6th generation. Following this guide will give you detailed instructions specifically for replacing the LCD and touch screen digitizer. Repairing this generation of Nano is quite simple and straight forward. Replacing a broken touch screen or LCD screen is quick and simple using this step by step guide.
This guide will help you to install the following iPod Nano 6th Generation part(s):
Tools Required:
- Safe open pry tool
- Small Phillips
- Heat Gun / Hair Dryer
iPod Nano 6th Generation Screen Repair Guide:
We recommend watching the below video from start to finish before starting the repair, and then pausing / rewinding and reviewing when needed.
Reverse the instructions above to reassemble your iPod.
Apple iPod Nano 6th Generation Touch Screen Digitizer & LCD Screen Replacement Summary:
Using this summary in correlation with the video will insure proper instructions are given and a safe repair is made.
- Use a heat gun or hair dryer and heat the adhesive. Make sure you use quick movements and heat along all sides edges.
- Use a safe pry tool to pry along all edges of the screen. Carefully lift the screen from the housing and remove all other adhesive. Remove the two small Phillip screws.
- Carefully remove the plate using a safe pry tool. You can now remove the 2 pop connectors.
- You can now remove the screen and replace it.
Notice:
Repairs Universe's guides are for informational purposes only. Please click here for details.
Learn about restrictions on reproduction and re-use of Repairs Universe's repair/take-apart/installation guides, and about creating hyperlinks to our guides.

