LG Xenon GR500 LCD Screen Replacement Repair Instructions
June 4, 2018 | 0 Comments
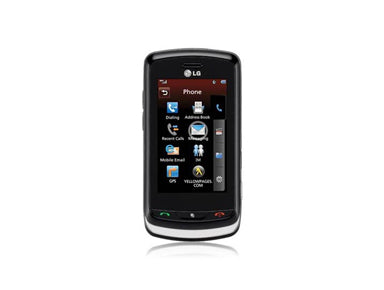
This is the LG Xenon GR500 LCD screen display replacement instructions showing how to repair your LG Cell Phone. This video take apart guide shows you the steps required for a safe and easy install.
This guide will help you to install the following LG Xenon GR500 part(s):
- LG Xenon GR500 LCD Replacement Screen
- LG Xenon GR500 Touch Screen Digitizer Replacement
- Other LG Xenon GR500 Parts
Tools Required:
LG Xenon GR500 Take apart guide:
We recommend watching the below video from start to finish before starting the repair, and then pausing / rewinding and reviewing when needed.
Reverse the instructions above to reassemble your phone.
Applying Adhesive to the Touch Screen Digitizer:
LG Xenon GR500 LCD and Touch Screen Digitizer Replacement Summary:
Using this summary in correlation with the video will insure proper instructions are given and a safe repair is made.
- Remove the battery and the sim card from the phone. Remove the 6 screws from the phone using a small Phillips screwdriver. Using the safe pry tool run along the sides of the phone to release the clips.
- Remove the 2 screws using the small Phillips screwdriver. Remove the volume key, the home button and the camera button from the phone.
- Slide the phone to the side and then lift the motherboard as gently as it is still connected by a flex ribbon cable. Ease the motherboard up and then release the pop connector using the safe pry tool. Once done remove the motherboard from the phone.
- Remove the 8 screws using the small Phillips screwdriver. Remove the keyboard layer form the phone. Remove the 6 small Phillips screws.
- Using a safe pry tool run as along all sides of the phone releasing the clips. Remove the layer from the phone. Using a safe pry tool un pop the pop connector from the bottom of the phone then un stick the ribbon from the back of the LCD screen, then remove the 2 small pieces of tape form the back of the LCD screen.
- Lift up the connector jaw and you can now remove the LCD screen. Use a safe pry tool to lift this from the phone. Gently pull it out the connector jaw and you can now replace the LCD screen or digitizer.
Notice:
Repairs Universe's guides are for informational purposes only. Please click here for details.
Learn about restrictions on reproduction and re-use of Repairs Universe's repair/take-apart/installation guides, and about creating hyperlinks to our guides.