Motorola Droid Bionic Video Take Apart Repair Guide
June 4, 2018 | 0 Comments
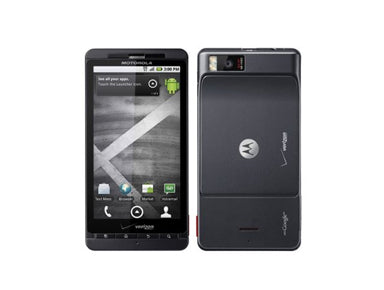
View the downloadable version of our how to fix your Motorola Droid Bionic screen guide.
This is a video repair guide for the Motorola Droid Bionic. This guide will go in depth on how to safely disassemble and repair your phone. Following this step by step guide will allow you to replace many internal parts for repair including the touch screen digitizer, LCD screen, flex ribbon cable, and other internal parts.
This guide will help you to install the following Motorola Droid Bionic part(s):
- Motorola Droid Bionic Touch Screen Digitizer Replacement
- Motorola Droid Bionic XT865 LCD Screen Replacement
- Motorola Droid Bionic XT875 LCD Screen Replacement
- Other Motorola Droid Bionic Replacement Parts
Tools Required:
- Safe Open Pry Tool
- T5 Torx Screwdriver
- Adhesive Strips (For touch screen repairs)
Motorola Droid Bionic take apart video guide:
We recommend fully watching the video before starting the repair, and then pausing / rewinding and reviewing when needed.
Reverse the instructions above to reassemble your device.
Applying Adhesive to the Touch Screen Digitizer:
Motorola Droid Bionic written take apart repair guide:
- Release the back battery cover to gain access to the back of the device. Remove the battery, sim card, and memory card.
- The next step will be to remove the battery adhesive tag. Use a safe open pry tool to carefully lift the sticker up and set aside.
- Remove the eleven (11) torx T5 screws around the perimeter of the back housing.
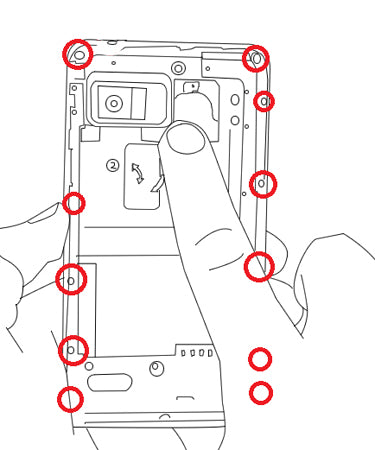
Figure 1
- Carefully pry along the edges of the back housing, releasing the clips and remove the back housing.
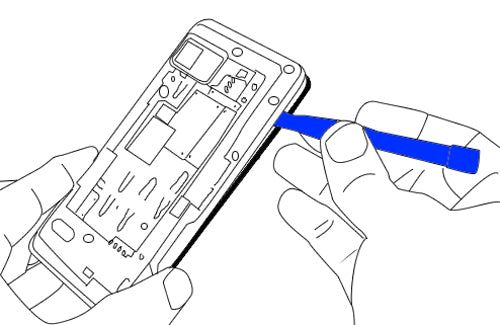
Figure 2
- Release the 3 flex cables.
- Remove the two (2) torx T5 screws holding the top sim board in place. Carefully remove this, along with a black plastic backing.
- Release the final connection for the front camera.
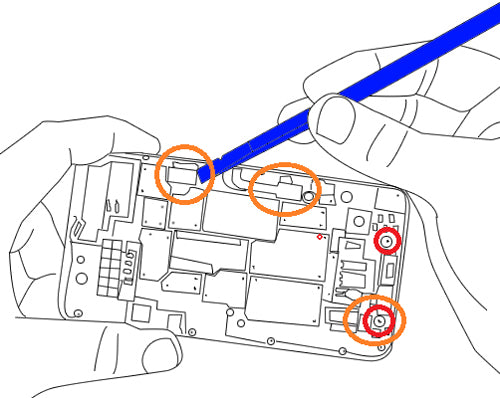
Figure 3
- You can now carefully remove the motherboard from the screen assembly.
- Lift the two touch screen flex cables from the LCD screen. They are very fragile and held in place with adhesive, so use extra caution.
- Use a safe pry tool to remove the LCD screen from the touch screen with front housing.
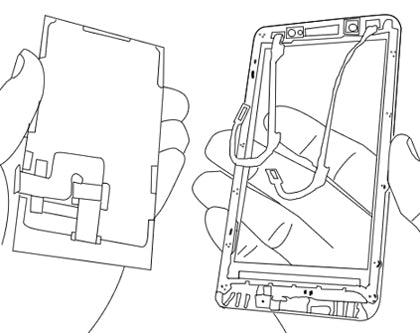
Figure 4
- To remove the touch screen digitizer from the front housing, use a heat gun or hair dryer to warm the front edges of the screen. Use quick movements for about 45 seconds.
- Now use a pry tool to carefully separate the glass from the front housing.
- You can now replace the touch screen digitizer or any other internal part on your Droid Bionic.
Simply replace the damaged parts with the new ones and reverse the order to put your phone back together again.
Notice:
Repairs Universe's guides are for informational purposes only. Please click here for details.
Learn about restrictions on reproduction and re-use of Repairs Universe's repair/take-apart/installation guides, and about creating hyperlinks to our guides.
